Showing posts with label garlic. Show all posts

Sunday, July 8, 2012

garlicky green beans, almonds, hard-boiled eggs


this is a quick post for a very quick and easy dish. seared green beans with blackened-y bits, lots of garlic, crunchy almonds, and just-right hard-boiled eggs come together in no time flat to make a hearty side dish, potluck favorite, or a light dinner for these summer dog days.


of course i shouldn't complain, living in relatively cool portland, but even 90 degrees feels hot when there's no a/c and fuzzy animals insist on wrapping themselves around you at all times. we've been keeping cool by eating lots of salad dinners and refrigerator scroungings and thinking cooling thoughts of arctic breezes. 

i don't even want to think about how i'm going to deal with being back in texas (in AUGUST, no less). lots of complaining and praising of central air conditioning, i guess.

anyway, this is simplicity itself. heat about a tablespoon of olive oil in a large pan on pretty high heat (like 8 out of 10 high). the heat is important because you want to get the beans nicely singed - it makes them way more flavorful. once the oil's shimmery, add about a pound of trimmed green beans.

let them sit for a minute or two, then you can stir every minute or so. don't get too crazy with the stirring - you want them to develop those nice black spots. they'll take 5 -6 minutes total. while that's happening, you can start the eggs. i don't know where i heard this, but the best way i've found to cook hard-boiled eggs is to cover them with about an inch of water, put them on high, let it boil for 1 minute, then take them off the heat and let them sit for 10 minutes before cooling them off in an ice bath. it's always worked really well for me and avoids that chalkiness and grey yolk layer that makes people hate them.


when the beans are just about tender (grab one out and nibble it, if you like), add a few big pinches of salt and 3-6 minced cloves of garlic. we are huge garlic people, so i err on the side of lots. you can go ahead and take the pan off the heat and just stir the garlic and beans around a bit so that the garlic loses its rawness. then after a minute or so, put them in a bowl with the juice of half a lemon and a handful of chopped italian parsley. or regular parsley. i'm not sure there's much of a difference.

this is best at room temperature, so once you're ready to eat, add perhaps 1/2 cup chopped toasted almonds, more salt if it needs it, and some chopped up eggs. you can make it look nicer if you make each plate up individually, but i also like adding the eggs to the bowl because the yolks add kind of a creaminess to the whole thing.

regardless, it takes about 15 minutes total and it's actually really filling and tasty. you could also add like grilled chicken to it if you wanted, but personally i think it's kind of creepy to eat chicken and eggs together.

but maybe that's just me.


*ingredients*
1 pound green beans (asparagus would also be good!)
3-6 cloves garlic
handful parsley
1/2 cup or so toasted almonds
3? eggs (i don't know - maybe like an egg per person?)
tomatoes would not be half bad, either

listening to: now that chicken and egg together thing made me think of paul simon's mother and child reunion. so that. 

Sunday, November 20, 2011

garlicky roasted cauliflower

lately i've been really frustrated with the gets-dark-at-4:30 part of living in the pacific northwest. now that i don't get home before 6, my only time to see the sun is during my lunch break. that means it's tough to get pictures of things for posting.

poor quality drawings from the computer's paint program are not exactly the same, but as those of us working for state agencies say, "good enough for government work!" (note: no one actually says that. state employees are incredibly dedicated and selfless individuals, clearly.)

you know how cauliflower is really gross when you eat it raw or boiled? well, it is. it's a little weird and sharp-tasting raw and once you boil or oversteam it, it gets all sulfur-y. no thanks. but when you roast it in a hot oven with chili flakes and garlic, it becomes another beast altogether - a pleasant and piquant taste sensation that i can't get enough of. if it helps, you could call it its french name - chou-fleur. that sounds fancy and perhaps tastier than boring old gross old cauliflower, aka the last vegetable on the tray when the dip runs out.

first, preheat the oven to 425. then cut a head of cauliflower into little florets. they don't have to be totally uniform in size, but you should aim for some degree of sameness. i usually cut the head in half, take out the stem part, then try to slice along its natural branches somewhat. then cut the bigger parts in halves or quarters - the more flat sides they have, the more delicious browning there will be (maillard reaction, ftw!).

then mince a good 4-5 cloves of garlic. you don't have to get them minutely small.

put the cauliflower chou-fleur on a large baking sheet with some chili flakes and perhaps a tablespoon or so of olive oil. stick it in the oven and let it go for 15 minutes or so.

after the 15 minutes, check to see if it's becoming brown. if so, go ahead and stir the florets around a little, so the other sides can get some heat. check it every 5-10 minutes after this and stir if it seems to need it. depending on how large the florets are (and how hot your oven actually is - those dudes can range pretty far afield from their nominal temperatures), it could take another 15 minutes or so.

when the little darlings are cooked through and nicely browned, add the garlic and let things cook for another 5 minutes or so, just so the garlic can get toasty and delicious without burning.

then lemon up the whole thing, add some salt and pepper, and eat up. this is good as a side for chicken or fish or with a couple of fried eggs on top and some crusty bread on the side. you can also add other flavorings, like thyme, za'atar, smoked paprika, etc. tossing some sesame seeds in when you add the garlic is not a terrible idea, either.

This method works well with brussels sprouts and broccoli, which are also among the poor maligned members of the brassica family. just cut them (brussels sprouts in halves or quarters) and roast away. green beans are also amazing done like this (especially the sad stringly green beans of fall). seriously, even if you think you don't like these guys, you will probably like this. also, none of these would be at all out of place at your thanksgiving repast.


*ingredients*
1 large head cauliflower
4-5 cloves garlic
chili flakes
salt & pepper
juice from 1/2 - 1 lemon

Monday, July 11, 2011

garlicky yogurt-marinated chicken kebabs

POW! i made these skewers to bring to a 4th of july grilling potluck. they were great because they are super-portable, you can assemble them ahead of time, and they are made from chicken thighs, so they stay moist even if you are too dazzled by sparklers to properly man the grill.

the day before you want to eat these, you should start marinating them. you can do it a few hours ahead of time, too, but i think it's better to have them soaking overnight, if you can.

the marinade ingredients are above, with the notable exception of the yogurt and the less notable exception of the aging half onion i found in the fridge and put in after taking this picture.

basically it involved lots of garlic, parsley, peppercorns and coriander seeds that i crushed a little, lemon zest (subsequent to this i chopped the lemon into smallish chunks and stuck it in too), and whatever other herbs you have around - i used some fresh thyme and oregano and dried sumac and za'atar and a little cumin. i put these all in a tupperware thing and added about a cup of yogurt (it was for about 1 1/2 pounds of chicken). it doesn't really matter how much you use - you just want to have enough to coat the chicken.

the chicken i used was free-range boneless skinless chicken thighs. as you can see above, i cut them against the grain into basically like three strips from each thigh. you can make the pieces whatever size you want, of course. it'll just affect their cooking time. once they were cut up, i tossed them in the marinade, made sure they were all coated, and left them in the fridge overnight. i stirred them a couple of times while they were marinating, just to make sure everyone got nicely acquainted.

i decided to keep it simple with these, although you could use any number of vegetables. i think things like zucchini or yellow squash would be good, or maybe little parboiled potatoes, or even (ugh) mushrooms, if you like that sort of thing. ooh, or olives! those would be really good. but i ended up just using an onion, some lovely little heirloom cherry tomatoes, and some lemon chunks. the lemon was really good because you could squeeze it over the other stuff after grilling. it's probably a good idea to let the skewers soak in some water for an hour or so before assembling the kebabs so that the wood doesn't catch on fire once they go on the grill.

i sort of threaded the chicken onto the skewers satay-style, to make sure it was not going anywhere. just alternate chicken and whatever else you're using. then grill them! or you could probably put them under the broiler of your oven. or, and this is the best method, get someone else to cook them for you! thanks, clifton!

*ingredients*
marinade:
1 lemon, zested and then cut into 8 or so pieces
4-5 cloves garlic, roughly chopped
big handful parsley, torn or roughly chopped
1/2 - 1 teaspoon each of peppercorns and coriander seeds, lightly crushed (you can use the bottom of a heavy pan or a mortar and pestle, etc)
1 tablespoon za'atar (or could use dried thyme, too)
2 teaspoons sumac (optional - just if you happen to have it)
1 - 2 teaspoons cumin
fresh herbs if you have on hand - oregano, thyme, mint would all be good

boneless skinless chicken thighs
1 onion or several small onions, cut in ~ 1 inch chunks
1 lemon, cut in ~ 1 inch chunks
cherry or grape tomatoes, squashes, olives, etc - whatever you want to put on there. try to make sure that things are somewhat uniform in size.

Thursday, June 16, 2011

(winner, winner) roast chicken dinner

oh yessss. everyone (everyone who eats meat, anyway) loves roast chicken. if you don't, you're doing it wrong. it is elemental comfort food at its best and it couldn't be easier. all you need is a) a chicken, b) some salt and pepper, c) a hot oven and d) other seasonings, if you want.

this was the last of our csa chickens, and i will miss having them in the freezer, but they got too expensive so this will be our last chicken dinner for awhile until i find somewhere else to get the free range ones that they humanely hug and kiss to death.

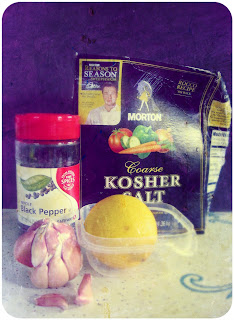
you can use any kind of seasonings you want - sometimes i use za'atar and sumac, sometimes rosemary and orange, sometimes smoked paprika and cumin and lime. this time i wanted to keep it simple so i used salt, freshly ground pepper, the zest of a whole lemon, and 4 medium cloves of garlic. the garlic and lemon were given a quick treatment with a microplane and then it all just gets mixed together.

you don't want to skimp on the salt here - for a smallish chicken (~3 1/2 pounds) i used maybe 2 teaspoons. it is pretty important to use kosher or some other coarse-grained salt, as it has a much better flavor and something about the larger crystals just makes it all-around better. i don't even have any regular table salt - i use kosher for basically everything. before you start messing with the chicken, you must turn on the oven to 450 - you want it nice and hot.

i don't have one of those fancy roasting rack thingies, so i use a collapsible steamer basket. it's kind of dumb, because it slips around and makes things a little precarious, but i like that it keeps the chicken off the bottom of the pan so all the skin gets crispy. clearly, if you are in possession of a roasting rack you should use that. or you can just leave it in the pan and it will still be good. just not as good.

here is where it gets a tiny bit gross. you have to rinse the chicken off and pat it dry with paper towels. you really want to get it nice and dry, since that helps the skin get all crispified. then you have to get the lemon/garlic mixture under the skin. here is a handy video that shows you how (albeit with butter). my first thought when watching this video was wow that is a lot of butter. my second thought was ZOMG that chicken still has feet! i am so glad the csa people took the feet off for me. i acknowledge that i am eating a chicken, but i really don't need to see its little feet.

so anyway, you could put butter under there too if that's your thing. but i never do and it's always plenty moist. but basically just hold little bits of the lemon mixture and stuff them under the skin and try to get them evenly through there. then shower a bit more kosher salt and pepper over the top and stick it in the oven.

i started it at 450 and turned it down to 425 after 25 minutes or so. this sort of depends on the size of your chicken and how fast it is browning. then cook it until a meat thermometer stuck in the thigh but not touching the bone registers 165 (the USDA's recommended temperature). this one took about 45 more minutes after i turned the heat down. i have read that a good rule of thumb is about 20 minutes of cooking per pound. also, when it is done the juices should run clear. also there is something about the leg wiggling easily. if it starts getting too brown before the temperature is high enough, put a piece of tin foil over the top, just resting on it lightly.

not to be all boring and USDA about it, but really you should just suck it up and get a meat thermometer so you will know for sure. food poisoning is no fun, and eating delicious roast chicken is meant to be a joyful experience.

oh, i also roasted some little potato wedges at the same time. they were pretty thin, so they took maybe 15 minutes or a little more. just put them on a pan with some oil (or you could get crazy and pour some chicken juices on them if you are especially dexterous) and salt and pepper and flip them when one side is brown. then take them out when they are done.

when the chicken is done (165!), take it out of the pan (still on the steamer basket) and let it sit on a thing with a little tent of aluminum foil over it. then you can pour off the juices in the pan, skim the fat from them (i pour the juices into a cup and use a spoon - it doesn't have to be all perfect), put the rest back in the roasting pan, and add juice from 1/2 a lemon and scrape up any bits that are clinging to the pan. you can also add a knob of butter or some dry vermouth at this point, depending on how simple you want the enterprise to be. put it back in the oven for a couple of minutes or over a burner on low/medium, so that it thickens up a little bit.

we had this with a simple green salad, the aforementioned potatoes (both of which, plus the chicken, had the pan sauce poured over them), and this delicious brown bread i made that i will do a thing about soon. this is a great sunday kind of dinner, but it's also fairly hands-off, so it works on weeknights too. also, leftovers are amazing in sandwiches the next day.

*ingredients*
1 whole chicken
zest from 1 lemon + juice from 1/2 a lemon
4 garlic cloves
salt
pepper

Friday, May 27, 2011

japanese turnip, radish, and sausage sauté

above is the green garlic i got at the farmers' market. it was all gone by the time i made the sorrel eggs, but that was because i used the last of it in this surprisingly tasty dish, so it was worth it. i was surprised by how great the turnips and radishes were in this - i don't think i've had japanse turnips before and i am pretty sure i've never had cooked radishes, so it was an enlightening experience all around.

these are my japanse turnips. they are so pretty, with their creamy whiteness and their nice green leaves. you could use the leaves in this dish, but i didn't - i am going to saute them up tonight with baby mustard greens and some garlic. you could also use the radish greens, but i already put those in some pasta the other night, so no greens here. it was still good, don't worry.

i washed the radishes (a small bunch - probably like 8 or 9 of them. these were regular old radishes from safeway, but you could use any kind), the turnips, a few stalks of asparagus (i cut the bottom off and then peel 1/2 - 2/3 of it so it's more tender), the garlic (i used about 3 stems of garlic, but you could also use a couple of cloves of regular garlic and mince it), and some snap peas. it was getting dark, so this picture is not the best. imagine some peas in there too.

i sliced the radishes and turnips thinly - you can make them however thick you want, but the thinner they are, the faster they cook. again, you can use a mandoline for this, but i am still a little gunshy, so i used a knife. if you want more stability when cutting, you can cut them in half from stem to root, so that you have a flat surface to set it on. but i thought they were prettier in rounds and i am pretty confident in my cutting abilities (mandoline problem notwithstanding).

slice up the garlics and asparagus (the garlic i cut very thin, the asparagus in ~ 1 inch chunks). you can either leave the peas whole or slice them in half. i like them whole, myself.

put maybe a tablespoon of butter in a largeish saute pan over medium heat. i let the butter brown a little before adding the garlic, because brown butter is the best thing in the world. it will foam up and then the solids will sink and start getting toasty. it is ready for garlic when it starts smelling like pancakes from heaven.

let the garlic cook a little, maybe for 30 seconds or so. then add the turnips and radishes and let it all cook for a few minutes, til they start getting softened. this will depend on how thickly they are sliced - mine were thin and took about 3 minutes. then add some cut-up sausage of your choice - i used free-range chicken sausage that was hot and italian-flavored. it was great. i also put some red pepper flakes and salt in at this point. i would have put some freshly-ground black pepper in too, but we are out. lame.

a couple minutes later, add some chicken stock or a little water - i should do a separate thing about chicken stock sometime, but basically whenever i roast a chicken i make stock and freeze it in a muffin tin, then take the stock-muffins out and keep them in the freezer - it is handy, tasty, and economical!

then you can add the asparagus and peas and maybe cover it and let it all cook together for a couple of minutes. it really doesn't take long, though, especially since peas and asparagus are so tender right now. if the sausage you used wasn't already cooked (ours was), make sure that it is cooked through so you don't die or whatever. i also added a slip of cream, since we had it around from the sorrel eggs. it made it pretty over the top, but in a good way. but it would be perfectly delicious without it.

i added some cooked rice to this because we already had it, but it would also be good over pasta or like quinoa or with toast. it was very springy and fresh, but also rich-tasting and satisfying. perfect for dinner!

you could also easily make it vegan by using olive oil instead of butter and either not using sausage or using some other substitute (or something like chickpeas would be good for a little extra heft and protein). you could also have it be vegetarian and use the butter, lose the sausage, and put a fried or poached egg on top.

*ingredients*

1 tablespoon butter

garlic - either a couple of cloves or 3 or so stalks of green garlic

1 bunch radishes

1 bunch japanese turnips (4-5)

5-6 stalks of asparagus

1 cup (or so) sugar snap peas

2 small sausages (can be omitted)

1/3 - 1/2 cup stock or water

1 little glug of cream if you have it (or greek yogurt would probably be good too)

rice/pasta/grain/toast, for serving