Showing posts with label simple. Show all posts

Sunday, June 10, 2012

zucchini & corn fritters with herbs and cotija cheese


tasty at room temperature, these little pancakies are perfect for zucchini season, when (possibly) well-meaning neighbors sneak up to your house and leave giant bags of them on the doorstep and you can't face one more chunky zucchini pasta thing. 

they are totes simple and work well for potlucks or a quick dinner. also you can make them teensy and pretend they're fancy appetizers. they were inspired by a recipe from the delightful nigella lawson (although, being british, she probably calls zucchini "courgettes"), but instead of being feta-y and mediterraneanish, i added corn and used cotija cheese, cilantro, and mexican spices for a more south of the border feel. i left the mint, though, because it really works here for some reason. 


the first thing to do is to get some water out of the zucchini. grate them (i used a food processor and it was so easy!), set the gratings in a strainer or colander over the sink, and sprinkle with a couple of pinches of salt. then let it sit for 20 minutes or so while you get the other stuff ready. 

i ended up using some leftover corn that we'd already grilled, but i think some nice fresh sweet corn would be fine to use raw. cut the kernels off and put them in a bowl with a couple of ounces of crumbled cotija cheese (you could also use feta or ricotta salata) and 5 or 6 sliced scallions and a handful each of cut-up mint and cilantro. 


is your zucchini done yet? after the 20 minutes (or longer), use all your might and squeeze as much liquid as possible from the grated shards. i find it mildly therapeutic. 


then mix the vegetables, herbs, and cheese together and add another pinch of salt, the zest from one lime, a minced clove of garlic, perhaps 1/4 teaspoon of chipotle powder if you have it, and 1/2 teaspoon or so of cumin. it'll still be good without the spices, but if you have them, you might as well throw them in there. 

finally, add 2 eggs, beat them a little to get things going, and then add ~ 1/2 cup of flour and mix until it all comes together. try not to go crazy with the mixing at this point, though, as you don't want the fritter-pancake things to get too tough. the batter will be quite thick, so don't freak out. it'll be fine.


i like to have two pans of these cooking at once to make it go faster. add perhaps a tablespoon of oil to a largish pan and let it heat over medium until the oil shimmers. you can use less oil and/or a nonstick pan, but the oil helps them brown and crisp up better, so keep that in mind.

then dollop the batter into whatever size you prefer. i like to flatten them down a little to ensure that the middle cooks before the outside burns. but if you like that sort of thing, by all means...

cook over medium to medium-low (depending on your stove - ours runs hot) until the outer edges are getting a nice burnishy brown. you can edge a spatula underneath to check them, but i wouldn't make a habit of it. flip and get the other side nicely brown (maybe 4 -5 minutes per side), then set them on some paper towels or a rack or something. serve with limes for squeezing over and, if you want, a simple yogurt sauce. they're good with just the lime, though. and they really are oddly great at room temperature, which is nice because you can make them ahead of time and get all freshened up before company comes over or whatever.

we have them as a side for roast or grilled chicken or fish, but they would also be a good lunch with a salad or, if tiny, as little blintze-y things to eat with a kalimoxto, some gin & elderflower, a pink greyhound, or a fruity tequila & tonic. and if you still have zucchini left over, you could try this delightful salad with corn, zucchini, tomatoes, and goat cheese.


*ingredients* serves 2-3-4 as a major side dish, more if making as appetizers
2 zucchini
1 1/2 - 2 ears of corn
~ 1/4 cup cilantro
~1/4 cup mint
~ 2 1/2 ounces cotija cheese
5 scallions
2 eggs
1 clove garlic
zest from 1 lime
1/2 cup flour
~ 1/4 teaspoon chipotle powder or hot smoked paprika (optional)
~ 1/2 teaspoon cumin (optional)
pinch or two of salt (optional)
lime

*yogurt sauce* (optional)
1/3 cup greek yogurt
1 tablespoon mayonnaise (or more, to taste)
pinch salt
maybe 1 tablespoon or so lime juice, or to taste
1/4 teaspoon cumin
1/4 teaspoon chipotle powder or smoked paprika (optional)

Saturday, February 4, 2012

fennel & apple slaw with citrus

the super bowl is today and what is more super-bowly than a crisp cool slaw? probably a lot, actually, like guacamole or nachos or (i guess this is a thing?) an entire edible stadium made of things like cold cuts, twinkies, and pigs-in-blankets.

this is not at all decadent or cheese-laced, so it's probably more like something you might want to eat tomorrow, after the delicious orgy of gluttony that this mighty day inspires.

this is a very simple and quick salad that uses some of the greats of winter produce - citrus and fennel. a little apple adds some sweetness, while celery brings more crunch. a bunch of scallions lend their mild vegetal bite and some apple cider vinegar ups that slaw-y tang.

basically the majority of the time it takes to put this together lies in cutting up the ingredients. slice the scallions into small coins or slightly on the bias to add a little more angular visual interest. slice the celery (i used 4-5 of the small tender inside ribs - the outer ones are more tough and may be better saved for a mirepoix or something, although if you do use them i would make sure to slice them extra-thinly) into crescents of ~ 1/8 of an inch or so.

cut the fennel in half lengthwise (in the picture above, you'd cut right down the middle) - fennel bulbs are kind of ovoid in shape, so you're cutting through the thinner side. then cut out the core using two cuts going down from the top of the core like an inverted V. slice the fennel very thinly, going horizontally from the bottom to the top. here is a very advanced diagram:

i'm pretty sure we're on the same page now. also, i always save the fennel fronds and add them in for a wispy garnishy effect. the rest of the fennel cast-offs can be saved in your freezer bag of stock-makings.

so yeah, get your ingredients cut up. for the apple, i quartered it and cut out the core, then cut the quarters in half (as you can see in the bottom left of the picture below) and then cut them into kind of large matchsticks or so. you could also use a mandoline to slice the everything but the scallions, but i think it's pretty easy to cut things up by hand.

put it all in a big bowl and add maybe 1/4 teaspoon each of orange and lemon zests. you can use more if you like, but the oils in the peel start to be more assertive after it sits for a bit and you want to make sure that all of the other flavors aren't overpowered.

then add the juice from the whole orange (or half, if it's enormous) and maybe half the lemon. add about a tablespoon or a little less of apple cider vinegar and 1/4 teaspoon or so of salt. i sweetened it with about 2 tablespoons of agave syrup, because i had it on hand and it dissolves well in cold liquids, unlike honey. you could also use some sugar to taste.

and that's it! this is a nice crunchy salad with some pleasant sweetness and brightness from the lemon and orange. i imagine it would also be good with different types of citrus - meyer lemons, blood oranges, tangerines, or grapefruits would all be interesting to try. also some radishes might be a good addition.

*ingredients*
1 bulb fennel
4-5 small inner stalks of celery
1 apple
a small bunch scallions (~5 or 6)
small amount of zest from 1 orange and 1 lemon
juice from 1 orange
juice from 1/2 lemon
~1 tablespoon apple cider vinegar
~2 tablespoons agave syrup or sugar, to taste

listening to: iron and wine, the sea and cake, the slug and lettuce (two are bands, one is a british chain of pubs. but which is which?!)

Saturday, November 19, 2011

honey/brown butter/bourbon-glazed carrots with crispy sage

omg you guys, thanksgiving is just around the corner! luckily, we at chez living awesomely are part of the best thanksgiving tradition ever - a group of food- and drink-loving pals gets together every year to try to out-dazzle each other with tastiness.

potluck is totally the way to go for thanksgiving, by the way - you get to taste different people's traditional family dishes and bring your own favorites, ensuring that it's never boring and that no one has to do everything (only to become bitter when guests don't fully appreciate the work that went into the puff pastry swan placecard holders that took 17 hours to make).

in that spirit, this is an easy and quick little side dish that would be more than welcome at any holiday gathering (or a regular old weekday dinner - it only takes like 15 minutes). sage, carrots, brown butter, honey, bourbon - what could be more autumnally appropriate? nothin', that's what!

first, peel the carrots. or don't. i prefer them peeled, and if you have a good peeler it doesn't take long. you also get all the joy of watching your dogs fall over themselves to grab up the peelings, never realizing that they have like 10 stuck in their fur at any given time. let the hilarity ensue!

you can cut them up however you like, although personally i find discs to be rather kansas-city-split-level-1987, but maybe that's just me. i was going to do this faux tourné cut, but apparently i lack the basic sense of spatial relationships that this requires, so i just made ~45 degree cuts facing alternate ways down each carrot. does that make sense? the picture above is meant to demonstrate this, but you could always try the other way (particularly if your parents acceded to childhood demands for a video game system - that might give you better hand-eye coordination than i ended up with).

once they are all cut up in whatever way you figure out for yourself, heat 2 tablespoons of butter over medium heat in a pan big enough for all of the carrots. once the butter melts, add some small sage leaves, stirring a little to make sure they aren't sticking together. this isn't an absolute requirement, and i think the carrots would still be good without it, but the little crispy sage leaves are really pretty delicious and provide a nice counterpoint at the end.

my sage leaves got crispy just as the butter was starting to brown, which was rather perfect. you may remember brown butter from such desserts as brown butter cherry berry clafoutis. it is a delicious marvel in everything it touches, and these carrots are no exception. it adds just the right nuttiness to bring out the sweetness of the carrots and honey.

so when the butter browns and the sage leaves crisp, remove the leaves and set them aside on a paper towel or something. then add the carrots, 1 tablespoon or a little more of honey, 1 tablespoon (or more) of bourbon, a cup of water, and some salt and pepper. you don't want to totally overdo it on the salt at this point, since the water will be evaporating and might make it too salty. i put in probably less than a teaspoon. i also put some more sage in - another 5 or so leaves.

then you turn the heat to high, cover the pan, and cook those beauties on up - it only takes 10 minutes or so. stir it pretty frequently - every couple of minutes is probably a good rule of thumb. you might have to kind of see what works for you with the lid - basically you want the water to evaporate enough to make a glaze and the carrots to cook through all at the same time.

once the carrots are done enough for your taste (mine were in fairly large chunks and took 12 minutes), take them off the heat and add a couple of teaspoons or so of lemon juice and some more salt, if it needs it. this'll brighten the whole thing up.

when you're ready to eat these, sprinkle them with the fried sage leaves - they add crunch and a lightly sage-y buttery flavor that brings it all together into a perfect distillation of the holidays.


*ingredients*
~ 1 1/2 pounds carrots (~5 large)
2 tablespoons butter
10 or so sage leaves
1 tablespoon honey (+)
1 tablespoon bourbon (+)
1 cup water
2 teaspoons lemon juice
salt & pepper

other good thanksgiving dishes:

also, pretty much any cocktail here would be good, particularly pear/ginger/lemon/bourbon. word on the street is that we will be having some kind of pear/rosemary/prosecco concoction at our festivities. i am All Sorts of excited.


Sunday, October 30, 2011

sweet & spicy roasted squash

i made these last night for a halloween party to which we were meant to bring spooky foods, so i called them goblin ribs.* when you make them, you can just call them delicious!

delicata squash is fantastic when roasted with an asian-inspired glaze that is equal parts sweet and savory and entirely tasty.

do you know the delicata squash (Cucurbita pepo)? it's one of my favorite winter squashes because it's dead easy to cook and you can eat the skin, so you don't have to take your life into your hands as you (i) do when trying to peel butternuts and the like. it's also a good size - two people can eat one and not have ridiculous leftovers.

all you do here is preheat your oven to 375. then trim the top and bottom from the squash and cut it in half. scoop out the seeds with a spoon. if you're the adventurous type, you could roast the seeds too, but we just got composting here in portland and my roasted squash seeds are never that awesome, so i don't feel too bad tossing them.

then cut each half into ~ 1/2 inch thick slices. don't they look a little like ribs? weird little alien goblin ribs, maybe? or maybe not. whatever.

just spread the slices on a cookies sheet and drizzle a little olive oil over them - maybe a tablespoon or two. then stick them in the oven for half an hour or so, flipping them after maybe 20 minutes or whenever the bottom sides are browned. while they're cooking, mix up the glaze.

i wanted them to be nice and garlicky, so i minced up two big cloves of garlic. you can use however much you prefer, though. mix this with about a tablespoon of honey and a tablespoon and a half or so of soy sauce. you also need a good few shakes of pepper flakes - however much you feel comfortable with. i also used a teaspoon of molasses, but you can skip that if you don't have any. it does add some nice depth, though.

pour the glaze over the sliced squash and stir it around a bit so all the slices get covered. then stick it back in the oven for 5 or 7 minutes - just until it gets nice and sticky and the garlic cooks up. you don't want it to burn, though, so keep an eye on it.

ta da! the glaze melts into the squash a bit and gets kind of candyish. these are good just eaten with your fingers, but you could also have them atop a salad or in a sandwich with some chicken or with rice and greens. you could also use the glaze on other winter squashes, like acorn or something.

*for the curious, other spooky foods included chicken witch's fingers, more witch's fingers made of cheddar-thyme gougères (soon to appear here), broken leg bones of phyllo-wrapped asparagus, pig-in-blanket eyeballs, and other delights. it was a deliciously spoooooky repast.

*ingredients*
1 delicata squash

2 cloves garlic
1 tablespoon honey
1 1/2 tablespoons soy sauce
pepper flakes, to taste
1 teaspoon molasses (optional)

Saturday, October 1, 2011

simple cozy brown bread

so it's officially fall now. grey days may still be slightly outnumbered by sunnyish ones, but the ratio is definitely heading toward portland's traditional parade of grey from october to may.

which is fine by me, actually. when it's grey and chilly out, there is nothing better than making yeasty brown bread. it fills the house with delicious smells and the joy of eating fresh homemade bread cannot be overstated.

this is a versatile little loaf, too. sometimes i make it with part rye flour, sometimes i use more molasses, sometimes i add some oats for part of the flour. i also like to set a little bit of dough aside in the fridge and add it to the next batch, like an ersatz sourdough starter.

the best thing about the bread, though, is that it is as simple as the proverbial pie (which, come on, is not that easy). you can let it rise for as little as 20 minutes, but i usually give it at least an hour or so. you could also mix it up the night before, leave it in the fridge for awhile, and let it warm up and rise for an hour or two the next afternoon and then bake it. whatever you want!

i got the initial recipe from the guardian. i've fiddled around with it a bit, but the recipe as is is plenty delicious. i do appreciate that english recipes tend to use weights for measurements - it makes it roughly 100% easier to switch things with no ill effects.

first, you bloom the yeast in warm water and molasses. i use one whole packet of that yellow-packaged active dry yeast. in the original recipe, it says that the water should be "at blood heat," which, while vaguely creepy, is probably about the temperature you want - lukewarmish. it also calls for black treacle, which is not something i normally come across here. so i used some blackstrap molasses (the strong molasses) and, because i like those really dark sort of sweet breads, i usually use at least a tablespoon or so instead of the meager teaspoon called for originally.

just mix 1/2 cup of warm water, the packet of yeast and the molasses and let it sit for 10 minutes or so. the yeast gets all excited and froths up, so don't mix them in something too small.

while you're waiting for the yeast to do its weird thing, mix up the rest of the ingredients - 1 pound of flour (either all whole wheat or part wheat and part other flour, like rye - experiment!) and a teaspoon (or a little more) of salt. i did one of those online conversion things that said that 1 pound of wheat flour is about 3 3/4 cups, but you'd really be better off just getting a scale. it's much easier and better for switching up flours, since it's more exact. but otherwise, i think you could go with a little under 4 cups of flour and be fine.

once the yeast has foamed nicely, add that mixture and another cup of warm water to the flour and salt. get it all mixed nicely and pour/scrape (it will be pretty wet, for bread dough) it into a greased loaf pan. i like to line the pan with some parchment paper - it makes it easier to get the finished loaf out. then let it sit for awhile in some warm place. the original recipe says just 20 minutes, but i think it should go for at least an hour.

this is also the point at which you could save a little knob of dough for the next batch. i don't know if it really makes a difference in the taste, but the idea appeals to me and i usually do this. i keep it in the fridge in an old olive jar and have used it 2 weeks after it was made with no ill effects. just add it to the new loaf when you stir the water and yeast mixture into the flour and salt.

it rises pretty well over the course of an hour, but this isn't one of those super-rising loaves. it's meant to be a more dense, thick-textured one, like the knobby wool sweater of breads. hmm, that doesn't sound as complimentary as it was meant to. but that's the kind of bread i want on chilly fall days.

preheat the oven to 450 and bake the bread for 20 minutes, then turn the oven down to 400 and let it bake for another 45 minutes + (it should sound sort of hollow when you tap the bottom of the pan). let it cool in the pan for a bit and then set it on a rack to cool fully. you can also take it out of the pan about 5-10 minutes early and set it back in the oven - it gets the crust crispy. but it is also kind of a hassle. so.

they always tell you not to cut warm bread because it something something ... whatever, i am not physically able to resist cutting warm bread. after you make homemade bread, it's an imperative. i mean, don't cut it straight out of the oven, sure, but i rarely wait more than 20 minutes or so before following the siren song of malty, yeasty goodness.

this bread's as good with tea and jam as it is with pimento cheese, salty butter and crisp radishes, or cream cheese, smoked salmon, and capers. in short, it is good with everything. when toasted and well-buttered, it makes a particularly fine accompaniment to soup.

i think i know what we're having for dinner...

*ingredients*
1 packet yeast (the original recipe has a measurement for fresh yeast, if you want to go that route)
1 1/2 cups water, divided
1 tablespoon blackstrap molasses (or you could use wuss molasses, if you like)
1 lb (450 grams, or ~ 3 3/4 cups) whole wheat flour (or mix of flours)
1 teaspoon or 2 salt

Saturday, September 10, 2011

beer-braised chicken, escarole, grapefruit, olives

wow, y'all, having a real-people job is tiring. i am totally not trying to complain, because i'm getting great experience in a field in which i want to practice, but man. once you add on the bus rides, i am suddenly gone for at least 45 hours a week. this has had a deleterious effect on the number of walkies the dogs get, as well as on my dinner-cooking.

the other day, however, i got off the bus for a brief 20 minute shopping expedition (so brief because that was the amount of time before another bus came). i wanted to make a quick and easy thing with some chicken thighs. they're great because they are more flavorful and less prone to drying out than are chicken breasts. also they're usually cheaper. so, bonus (especially since we always use humanely-raised chicken, which is more expensive but Worth It).

i decided to make a dish i think of as vaguely french - chicken sort of braised (in beer!) with oil-cured black olives, citrus, and greens. this time i used boneless, skinless chicken thighs, but it's great with regular ones. it just takes longer to cook. also sometimes instead of greens i use fennel and little potatoes. the citrus can be lemon or orange or something as well.

actually, i thought it was going to be orange in this dish, but what i remembered as an orange in our fridge turned out to be a grapefruit. luckily, it turned out to be more of a happy accident than a mistake, as the escarole and grapefruit really got along well. so well, in fact, that they are going to the movies this weekend and didn't even invite me. that grapefruit is such a friend-poacher.

who wouldn't love escarole, though? it shares a family line (chicory!) with things like endive, radicchio, and the chicory that so delightfully flavors new orleans-style coffee. like those other lovelies, it has a bit of a bitter edge that lets you know it means business. it's no baby spinach you're dealing with here.

but where cousin endive is a little buttoned-down and staid (all those leaves folded tightly together into a little bullet), escarole is frizzly and wild, letting its leaves go where they may with little regard for propriety. it's great in soups or as salad with maybe a hard-boiled egg vinaigrette and it's fantastic in this dish.

prep for this is really easy, as one would expect of any good weeknight dinner. just cut off the bottom stem thingy of the escarole and cut the leaves into about 1 inch lengths, moving up from the end.

the rest of the ingredients can be dispatched almost as simply. slice two cloves (or more) of garlic thinly and one medium shallot slightly less thinly. chop up some italian parsley. i actually leave the olives whole, but you could pit them if you want to be particularly fancy. use a microplane or similar to zest your citrus. i used the zest from about half of the grapefruit, as it's strong. if you use lemon, just chop it into eighths or something and don't bother zesting it first.

the citrus flesh (if you aren't using lemon) is the only part of this that could be a little fiddly. i like to cut the sections into supremes because i don't care for the membrane things around the meat part, especially when using grapefruit. if you want to just make thin slices going from pole to pole, however, i don't think it would be the end of the world. if you want to try your hand at supreming, here's a video. once you get the hang of it, it really doesn't take long.

once everything's cut up, heat a tablespoon or two of olive oil on medium-high heat in a pan large enough to hold all of the chicken thighs in one layer. once the oil's shimmery, add the chicken (put a little salt and pepper on it first). don't move it for a couple of minutes, then check a piece to see if it's browned. you're basically just trying to sear it, not cook it through at this point. flip once and brown on the other side. once both sides are brown, set the pieces of chicken on a plate to wait.

turn the burner down to medium-low (i think it was at about 5 on our dumb electric stove) and heat a little more olive oil if necessary. add the shallot, let it cook for 30 seconds or so, then add the garlic and let them both go for another 30 seconds. then add the escarole. as with so many greens, it'll look like a ridiculous amount when you put it in, but it wilts down a great deal as it cooks.

after about a minute or three (or whenever it starts looking a bit dry), add about half a bottle of beer. i used anchor steam, because that's what was in the fridge. i think any good normal beer would work. you probably don't want a stout or a miller chill, but anything in between would probably be good. i also sometimes make this with a dry white wine or some dry vermouth and chicken stock. so you have options, if you don't want to use beer. but the beer was really good in it.

then add the chicken back (i usually cut it into large chunks before this, so it cooks faster), as well as the olives and parsley, the zest, and the grapefruit. turn the heat down to lowish and let it cook partly covered for half an hour or so until the chicken is done. i usually just take a piece out and cut into it to check, but you could also use a thermometer to make really sure. taste the broth and add salt and pepper, if necessary.

this is good as a sort of stew, if you have lots of crusty bread to dip in the amazing sauce that forms when all of those bold flavors mix and mingle and get friendly-like. it would also be great on pasta or some little boiled potatoes. or rice. or quinoa.

basically, it's versatile, tasty and pretty quick. not too bad for a wednesday night dinner.

*the chicken in the picture above is a classic example of how you should do as i say, not as i do. i totally didn't sear the chicken first (although i usually do) and it was not as good. definitely go for the browning step. also you don't get a sense of how saucy this is because i had to take a picture before it was done. stupid early-setting sun.

*ingredients*
~ 1 pound boneless, skinless chicken thighs (or more, if you are using regular chicken thighs)
1 head escarole
1 citrus fruit (grapefruit, orange, lemon)
2 cloves garlic
1 medium shallot
10 + oil-cured black olives (usually available in the fancy-olive section of the supermarket)
1/4 or 1/3 cup chopped italian parsley
1/2 a beer or similar amount of wine, stock, etc.
salt and pepper to taste

Sunday, July 24, 2011

mango salad/salsa/relish

i was thinking of having all of my posts this week be oriented around a baking theme, since i actually have been baking a lot and it seems like the whole country is kind of baking in this horrible heat wave (over 100 degrees all across the east coast? those are texas-style temperatures!).

but then i came to my senses and decided that that would be kind of mean. not everyone can live in portland, plus i am sure our time will come for unbearable heat. why not make a simple, sweet, spicy mango salad instead?

this is the perfect beat-the-heat dish because it has 6 ingredients, takes 5 minutes to make and doesn't require you to even look at your stove. it has sort of southeast asian flavors, but uses ingredients that are very easy to find practically anywhere.

all you need is a mango, some mint, cilantro, 1/2 a lime, a couple of scallions, and 1/3 or so of a fresh jalapeño. i didn't even use any salt or pepper. cut up the mango like i showed you earlier, put it in a bowl. slice up the scallions and jalapeño. you can certainly use more of anything that you like - i wanted it to be spicy but not too spicy. i cut the jalapeño very thinly so that it wouldn't be too overwhelming in each bite.

chop the herbs - i like to pile the mint leaves on top of each other and then roll them into a kind of tube with the stem part in the middle and then slice it - this helps you have a nice ribbony shape and makes it easier to slice. the cilantro i just kind of ball up and cut. basil would also be good in here, cut the same way as the mint. but i don't have any basil. i also think a little fish sauce would not be out of place, if you have any. but again, i do not. i am so unprepared. how embarrassing.

then squeeze 1/2 a lime over the whole thing and stir. that's it! you should taste it now. you might want to add a little pinch of sugar. lime juice is sour, yo! don't overdo it though. this is supposed to be sweet and savory. this is best eaten right away, although it is still pretty tasty after an evening in the fridge.

i can imagine this being a good accompaniment to grilled fish or chicken or tofu. if you want to use it as a salsa, you should probably cut the mango into smaller bits. you could also add a little tofu or cooked rice to make it more substantial. or maybe have it with other asian-y salads, like a salad smorgasbord! or you could stand in front of the open fridge and scoop it out of the bowl with your fingers. i won't judge you. we all go a little crazy when it's hot out.


Thursday, June 16, 2011

(winner, winner) roast chicken dinner

oh yessss. everyone (everyone who eats meat, anyway) loves roast chicken. if you don't, you're doing it wrong. it is elemental comfort food at its best and it couldn't be easier. all you need is a) a chicken, b) some salt and pepper, c) a hot oven and d) other seasonings, if you want.

this was the last of our csa chickens, and i will miss having them in the freezer, but they got too expensive so this will be our last chicken dinner for awhile until i find somewhere else to get the free range ones that they humanely hug and kiss to death.

you can use any kind of seasonings you want - sometimes i use za'atar and sumac, sometimes rosemary and orange, sometimes smoked paprika and cumin and lime. this time i wanted to keep it simple so i used salt, freshly ground pepper, the zest of a whole lemon, and 4 medium cloves of garlic. the garlic and lemon were given a quick treatment with a microplane and then it all just gets mixed together.

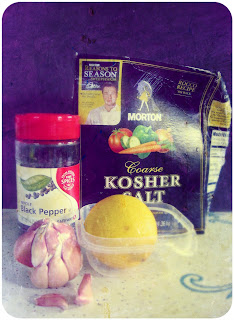
you don't want to skimp on the salt here - for a smallish chicken (~3 1/2 pounds) i used maybe 2 teaspoons. it is pretty important to use kosher or some other coarse-grained salt, as it has a much better flavor and something about the larger crystals just makes it all-around better. i don't even have any regular table salt - i use kosher for basically everything. before you start messing with the chicken, you must turn on the oven to 450 - you want it nice and hot.

i don't have one of those fancy roasting rack thingies, so i use a collapsible steamer basket. it's kind of dumb, because it slips around and makes things a little precarious, but i like that it keeps the chicken off the bottom of the pan so all the skin gets crispy. clearly, if you are in possession of a roasting rack you should use that. or you can just leave it in the pan and it will still be good. just not as good.

here is where it gets a tiny bit gross. you have to rinse the chicken off and pat it dry with paper towels. you really want to get it nice and dry, since that helps the skin get all crispified. then you have to get the lemon/garlic mixture under the skin. here is a handy video that shows you how (albeit with butter). my first thought when watching this video was wow that is a lot of butter. my second thought was ZOMG that chicken still has feet! i am so glad the csa people took the feet off for me. i acknowledge that i am eating a chicken, but i really don't need to see its little feet.

so anyway, you could put butter under there too if that's your thing. but i never do and it's always plenty moist. but basically just hold little bits of the lemon mixture and stuff them under the skin and try to get them evenly through there. then shower a bit more kosher salt and pepper over the top and stick it in the oven.

i started it at 450 and turned it down to 425 after 25 minutes or so. this sort of depends on the size of your chicken and how fast it is browning. then cook it until a meat thermometer stuck in the thigh but not touching the bone registers 165 (the USDA's recommended temperature). this one took about 45 more minutes after i turned the heat down. i have read that a good rule of thumb is about 20 minutes of cooking per pound. also, when it is done the juices should run clear. also there is something about the leg wiggling easily. if it starts getting too brown before the temperature is high enough, put a piece of tin foil over the top, just resting on it lightly.

not to be all boring and USDA about it, but really you should just suck it up and get a meat thermometer so you will know for sure. food poisoning is no fun, and eating delicious roast chicken is meant to be a joyful experience.

oh, i also roasted some little potato wedges at the same time. they were pretty thin, so they took maybe 15 minutes or a little more. just put them on a pan with some oil (or you could get crazy and pour some chicken juices on them if you are especially dexterous) and salt and pepper and flip them when one side is brown. then take them out when they are done.

when the chicken is done (165!), take it out of the pan (still on the steamer basket) and let it sit on a thing with a little tent of aluminum foil over it. then you can pour off the juices in the pan, skim the fat from them (i pour the juices into a cup and use a spoon - it doesn't have to be all perfect), put the rest back in the roasting pan, and add juice from 1/2 a lemon and scrape up any bits that are clinging to the pan. you can also add a knob of butter or some dry vermouth at this point, depending on how simple you want the enterprise to be. put it back in the oven for a couple of minutes or over a burner on low/medium, so that it thickens up a little bit.

we had this with a simple green salad, the aforementioned potatoes (both of which, plus the chicken, had the pan sauce poured over them), and this delicious brown bread i made that i will do a thing about soon. this is a great sunday kind of dinner, but it's also fairly hands-off, so it works on weeknights too. also, leftovers are amazing in sandwiches the next day.

*ingredients*
1 whole chicken
zest from 1 lemon + juice from 1/2 a lemon
4 garlic cloves
salt
pepper